Pages

Showing posts with label organizing recipes. Show all posts

Wednesday, April 13, 2011

Come to the Dark Side...of Chocolate.

Dark Chocolate Cake with Ganache

If you're not a fan of dark chocolate, then this cake is probably not for you.  It's deep, dark and chocolate!    I call these types of cakes "cheater cakes", because the base is a boxed mix.  I know!  Shudder the thought and my sweet, southern mama would be so disappointed in me, but that'll be our secret, right?

First off, you're going to need:
Cake:
1 box Devil's Food Cake Mix (or if you can find it, Swiss chocolate!)
1 box (3.9 oz) instant chocoloate pudding mix
1 cup water
4 eggs
1/3 cup vegetable oil
1/2 cup (4 oz) semisweet chocolate morsels

Ganache:
1 cup heavy cream
1 pkg (12 oz) semisweet chocolate chips
1/3 cup powdered sugar

Cake:
Preheat oven 350 degrees.  Spray bundt pan with Baker's Secret, or other type of oil and flour mixture.
Combine the cake mix, pudding mix, water, eggs and oil in a bowl and beat for 2 minutes, or until well blended.
Stir in the 1/2 cup chocolate chips.  Transfer batter to prepared Bundt pan. 
Bake 45 minutes or until toothpick inserted near center comes out clean.
Cool cake in the pan on cooling rack for 15 minutes.
Invert cake onto cooling rack.  Place cooling rack on top of a cookie sheet.  Cool cake completely.

Ganache
Pour cream into saucepan, whisk the powdered sugar into the cream.  Heat until small bubbles appear.  Remove from heat and add the 12 oz. chocolate chips.  Stir until smooth.  Cool until just slightly warm.  Pour ganache over the cooled cake.  Transfer to serving platter.  (I used a couple of BBQ spatulas to do this - worked great!)

Note:  We're pretty much milk chocolate fans in this household, but this is a nice change.  It's not too sweet, but it feels dark and rich (huh?!)  I sent the cake to work with hubby, so we'll see what the consensus is when he comes home.   I'd love to hear your impression of it if you decide to bake this cake!

Monday, December 27, 2010

Hey there! Sharing my Red Velvet Bon-Bons on my other blog


Are you still recooperating from Christmas?   Got plans for New Years Eve?   I just wanted to pop in to tell you know that I've posted my Red Velvet Bon-Bons on my "other blog"  Real Women Eat.  So if you'd like to snag the recipe, go on over there and grab it.    I'll be back soon!

Monday, March 15, 2010

Organizing My Recipes from magazines

I don't know if you're like me, but I can't pass up a magazine that has a great looking whatever on the cover. Usually it's a dessert that catches my eye, but other foods too. And usually there's really only a few recipes I really like in it.

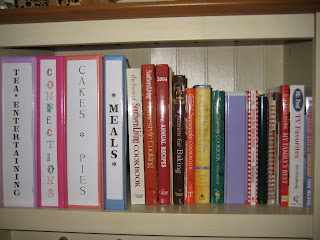
I used to keep all those magazines, but that gets out of hand way too soon. Then, if you just tear 'em out of the magazine, where do you keep them? I started doing notebooks probably 20 years ago. I've even taken pages out of cookbooks (though not very many!) that I knew I'd never make anything out of but a few dishes and put in my notebooks. I put 'em in page protectors (I like to use the heavy duty ones). In the "BiteSized Confections", I have dividers in for bars - n - brownies, candy - n- cookies, cupcakes - n- muffins, Dips - n - Spreads, Snack Mixes... you get the idea.

Recently I told someone that's what I did and they looked at me like I had just invented the cure for the common cold. Now, I know I'm not the first person on the planet to think of this, but if it was news to that person, perhaps there are other people who could use this information.
So there you go. Go forth and book-it! LOL


and here they are, all nestled in with my other cookbooks in the kitchen cupboard.
Oh, and in case you're wondering, no, that's not all the cookbooks I have! LOL Isn't it funny, the one labeled "meals" is skinnier than the sweets ?!? ROFL!!!
Oh, do you see the shorter lavendar notebook further to the right? That's one that I have written recipes in! (I'm a notebook nut!)
Also, within reach in the kitchen (which is the central hub for the family, right?) I have a notebook with sections for business cards of people like a painter, handyman, yard-guy, etc.,


take-out menus.....


owner's manuels for small appliances and gadgets (that I can never remember how to operate!)

Notice it's not pretty colors like the recipe ones? I don't think my hubby would use it if it was one of those "girlie" colors. I'm so proud of him when he goes to the black notebook to order his pizza on "race day"! I put it all together and he's learned where to look. He thinks I'm smart. I like that.


I'm linking to Raising Homemaker's  homemaker's link-up party. 

Friday, December 11, 2009

FREEZER FOODS FRIDAY


Today is Freezer Foods Friday, and I have a great freezer food!!!  COOKIES!!!   Yes, these are totally freezable!  I was holding off on these for the Christmas Goodies Recipe Exchange on the 15th.  Please come back and link up for that!  See the instructions here.

Now for the cookies.  These are Butterfinger Cookies.  My hubby goes on annual golfing trips with his buddies from church (yeah, a golf "mission trip"  LOL) out of state.  I made cookies for the trip.  I don't think he wanted to take them, being off with "the guys" and all, but he took them with him on this long car trip.  After several miles, they started commenting on how hungry they were getting but not wanting to stop yet.  So, hubby announces he brought cookies.   A few (very few) miles later, I get a call from the car... I hear yelling "thank you's" from all the men and wanting to know if I could ship some to their destination because the ones I sent were all gone.   So, these cookies passed the "guy test" too!  LOL  Here's my recipe:


Butterfinger Cookies
1/2 cup butter, softened
3/4 cup sugar
2/3 cup packed brown sugar
2 egg whites
1 1/4 cup chunky peanut butter
1 1/2 tsp vanilla extract
1 cup all-purpose flour
1/2 tsp baking soda
1/4 tsp salt
5 Butterfinger candy bars (2.1 ounces each)  chopped

In a large mixing bowl cream the butter and sugars until light and fluffy.  Beat in egg whites.
Stir in peanut butter and vanilla.
Combine the flour, baking soda and salt; gradually add to the creamed mixture.  Stir in candy bars.
Shape into 1 1/2 inch balls and place 2 inches apart on a greased baking sheet.  Bake at 350 degrees for 10-12 minutes or until golden brown.
This yields about 4 dozen. 

Here's the freezer part:  (LOL)
I make the cookie dough, roll into balls and then put in the freezer until frozen.  Remove from the pan, rack, or whatever you placed them on in the freezer,  and put them in a ziploc bag to keep in the freezer.  I usually put into the bags however many I am  planning on making at a time.  They freeze really well.

Ok, now it's your turn.  Do you have a great freezer food,  or make-ahead recipe?  Link up to your blog post.  And please be kind and link back to here so everyone can see the posts.  Thanks  bunches!


LinkWithin

Related Posts with Thumbnails