Pages

Thursday, December 30, 2021


This is my cyber-shop. It's filled with... all things girly.
Whether you're looking for hair accessories, totes, and bags, gift tags, or
even tea envelopes, and my newest addition...Buntings, you can be sure it's handmade by me one by one. Every item comes with an extra dose of love.


This Friday, Black Friday, I am offering special deals, and door busters! At 11:59 I'll be going into my Etsy shop and changing prices for this special day. Plus, offering these great deals...


Thursday, December 31, 2020

Hey y'all!  I'm just tickled to death that Tammy has asked me to be a guest today on her blog!!!  Tammy and I met through Blogfrog, and I do believe it was an instant friendship!  And I know if you've been following her blog, then you already know what a sweetie pie she is!  

A little about myself... I live in Florida, which "technically" is the south but the farther south you go, the more north you are!  LOL.  I was, however fortunate enough to have a wonderful "southern" mother and father who made sure all the good things of the south were instilled in me.  (I'm grateful).   I was a medical transcriptionist for 27 years, and then became a closed captionist (you know those words on the bottom of the tv screen?  yeah, that was me).  But now, I'm a homekeeper and I love it!  I love all things domestic and that involves feeding my man, and constantly re-arranging my nest!  LOL

As any good southern girl knows,  you don't go callin' on friends empty handed, and it's practically always with food!  So that's why I'd love to share a few recipes with you...are ya up for it?    I've got in mind a broccoli cheese soup, and muffins.  There is a restaraunt in a little town in the next county called Lunch on Limoge.  Get this!  It's smack dab in the middle of a department store!  No kidding!   Ok, maybe not right in the middle, but it's to the side.  And not walled off, either,  You can reach behind you and feel the fabric of a dress if the mood strikes you!  And I'm not kidding about THAT!    Well, (oh, did I mention that I'm so easily side-tracked?!?  LOL)
this restaurant is famous for their muffins.  They are awesome!   You get a basket of mini muffins with your meal, and whatever fruit the put in the muffins that day, is the flavor butter you get!  YUM!

Well, about 20 years ago, I scored that recipe and it's been one of my prized recipes all this time.  I'm going to share it with you!

First, the Broccoli Cheese Soup

It's supposed to be like Panera Bread's Broccoli Cheddar Soup. The first night we ate it, I didn't think it tasted like it...I finished off the left-overs today for lunch. Yep. I think it taste like Panera's. I guess ya have to let it rest a day before eating!


You're going to need...


3 cups broccoli florets
4 cups chicken broth
1 cup half-and-half
1/2 cup all-purpose flour
8 slices Kraft Singles Sharp Cheddar Cheese (I know, right?)
1/2 cup shredded carrot
1/3 cup diced white onion
pinch ground black pepper

Steam broccoli in a steamer basket over boiling water in a covered saucepan for 6 minutes.
Remove broccoli to a copping board until cool, then use a large sharp knife to dice broccoli into pieces that are about the size of peas.
Pour chicken broth into a large saucepan with half and half. Whisk in flour, and then add remaining ingredients, including the broccoli.
Turn heat to medium, stirring often until mixture begins to bubble.
Reduce heat and simmer for 30 minutes or until carrots are tender and soup is thick.
(Makes 4 servings)

And now, for those muffins.   (Oooooh you're gonna thank me!  LOL)

Oh! and they're called Six-Week Muffins,  because you can keep the batter in the frige for up to 6 weeks without worry!They're not hard at all, and , well... they keep a good while. But, I've never had to worry about 'em lasting past six weeks! LOL


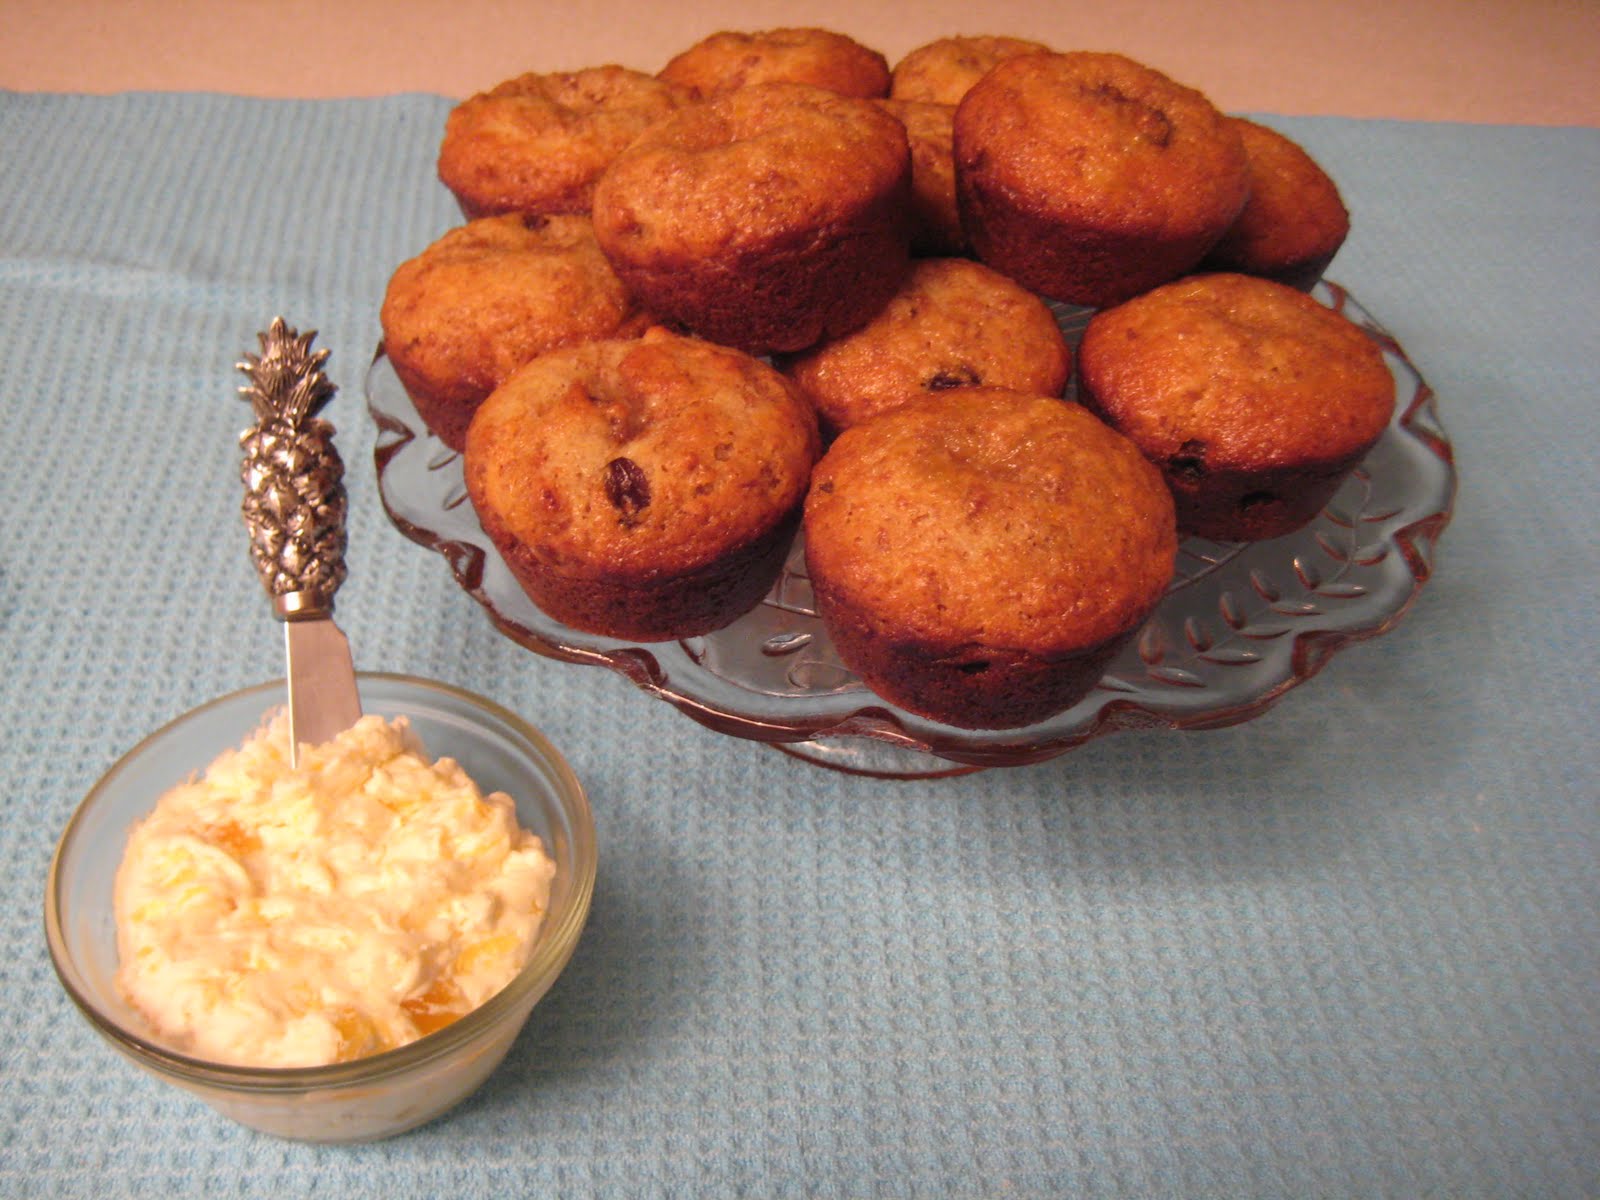
 Six Week Muffins


Here's what you'll need:  


4 beaten eggs
2 cups sugar
1 cup salad oil
1 quart buttermilk
5 teaspoons baking soda
2 teaspoons salt
5 cups flour
1 (15 oz) box Raisin Bran, or Raisin Nut Bran cereal (I used reg. rasin bran)

Mix all ingredients well. You can add any fruits , nuts, coconut, if desired

I added a can of drained crushed pineapple to half of the batter (the measuring/mixing bowl up top)
Bake at 400 degrees for approximately 10 minutes for miniature muffins; 18-20 minutes for large.
I freeze mine after baking. (Got a zippered freezer bag of 'em in the freezer now!)


I decided to make some pineapple butter too
So there you have it,  Was I right?  It is easy enough, see?    I've enjoyed sharing and being a guest here today.  Thank you so much for having me!  Now all y'all be sweet and enjoy each other's company.  Spread some friendly smiles all over!


Thursday, August 25, 2016

Hey there!

I just wanted to share with you a new post on my other blog, RealWomenEat.com   It's absolutely amazingly good!  I've never made lasagna in the crock pot before, let alone use feta cheese in the recipe, but this was great!  And Mr. Man of the House said it was definitely a keeper.  So if this tempts you enough, why not head over to Real Women Eat and check it out....and you're welcome!


Friday, February 26, 2016

Freezer Cooking with Friends


Freezing with Friends is definitely a fun way to lighten the load of bulk cooking, prepping and freezing all that food.  Plus, you get to try new recipes.  Recipes that your friend's family have enjoyed (and hopefully yours will too).  

Last year, my cousin's wife, and my dear friend, mentioned she was running out of ideas for meal time.  I told her I was getting ready for another freezer session and asked if she wanted to do it together.  So began our Freezer Parties.   By the way, we also do canning parties - but that's for another day.

There are many approaches to 'Freezing with Friends' and you can tailor make it to your needs, or whims.  One method is a Freezer Swap.  For this, you don't necessarily freeze together, but it's like a cookie exchange.  You might want to keep it small, because you will prepare a meal for each person.
The method my friend and I used, though, is the one I like best.

We put on our calendar a date to get together to plan.  Each of us came up with a list of recipes our families loved.  She had never done a freezer session so she came armed with recipes they loved and we decided if they froze well and would work. Most recipes convert well to freezer cooking but there are a few ingredients that, though won't harm you if frozen, just don't hold up well.  A good rule of thumb, if you've seen it in the frozen food section (think TV dinners) than you can freeze it! And if you're just not sure, when you prepare a favorite dish, put a portion in the freezer.  Try it in a month.  Do you like it? Did it re-heat well?  Winner!   Our list was long, so we concentrated on trimming it down to a workable session and save the others for another time.  We decided on ground beef and chicken categories.  And, being the list maker that I am making a list in what order we would be doing the food according to like ingredients.  A planning day is very important.  There were some ingredients in my favorites that her family didn't care for so those where whittled off the list right away.  Had we not planned.. oh boy!

Next step was to list all our ingredients and gather total measurements from all their  ingredients list. (We're making our master shopping list) and making note of what we have in our pantry like spices, etc.  

Next, shopping!  We ended up going to Sam's Club for most of our supplies, but stopped at a grocery store to finish up.   Don't forget to get the pans you will be freezing in!  We found the party supply store had the cheapest prices at that time.  So check around.

Next, actual preparing day! Since she had a 2 year old, we do things at her house so I bring all my kitchen supplies, pots, crockpots, etc. with me early that morning.  We have breakfast and start right into it.  We had a blast and by the end of the day had a month's worth of meals to slide into the freezer.
(just one section of her kitchen with some of the dishes!)

And here's the recipe for the super-easy manicotti pictured here...

2 packages Manicotti (14 each)
1 pound ground beef
2 eggs
1 box chicken stuffing mix (like Stove Top)
2 cups cottage cheese
2 cups shredded cheddar cheese
1/4 to 1/2 cup Parmesan cheese (depending on how much you like it)
8 cups prepared spaghetti sauce

Mix stuffing mix, seasoning packet that comes with it, beef, eggs, cottage cheese, Parmesan and cheddar cheese to make a thick paste.  Set aside 5 minutes to absorb moisture.  Spread small amount of spaghetti sauce in pan.  Stuff uncooked manicotti shells and place side by side in pan.  Spoon spaghetti sauce over shells.

To bake: cover and bake 350 degrees 1 hour.

To Freeze:  Cover with foil, or Ziploc bags.  Freeze up to6 months.  To bake,thaw overnight in frige and bake according to directions.

This recipe makes two 9 x 13 pans, or three 8 x 8 pans.

So have you tried "freezing with a friend", or any other variation?  Share with us in the comments.  I'd love to hear!


Saturday, February 20, 2016

Chocolate Coma Cake


Prepare yourselves.  If  your prone to sin, I beg you, don't take one bite of this cake. This cake is chocolate on steroids.  Seriously.  Often I will do a prototype and then tweak it.  I was going for something totally decadent and I think I achieved that.  I will not be tweaking this one.   I was just going to call it a chocolate poke cake, but when I used my nephew as a guinea pig, he dubbed it "Chocolate Coma Cake".  So that's how this baby got it's name.

I'm going to share this recipe, but don't hold me responsible for contributing to your caloric demise. You've been warned.

Chocolate Coma Cake

Cake
2 cups sugar
2 cups flour
1 teaspoon baking soda
1/2 teaspoon salt
1 teaspoon vanilla
2 sticks butter
4 tablespoons cocoa powder
1 cup water
1/2 cup buttermik
2 eggs

Filing (for poking in the cake
14 oz can sweetened condensed milk
1 cup semi-sweet chocolate chips

Chocolate Whipped Cream Topping
2 cups heavy whipping cream
1/2 cup powdered sugar
1/4 cup plus 2 tablespoons cocoa powder
1/2 teaspoon vanilla extract

Optional:
mini chocolate chips
chocolate ice cream topping (the kind you squeeze)

Directions:
Cake:
Melt butter over low heat.  Add Cocoa and water and bring to a rapid boil, remove from heat.
Mix sugar, flour, soda and salt in a large bowl.  Pour heated ingredients over dry.
Add buttermilk, eggs and vanilla.  Mix well.  Pour into greased and floured 9 x 13 pan.  Bake 350 degrees for 25-35 minutes.  All ovens are different.  Mine is possessed so I watch mine like a hawk.

Once cake comes out of the oven, poke holes all over the top of the cake. 

Place sweetened condensed milk and 1 cup  chocolate chips in a microwave safe bowl.  Microwave for about 30 seconds to 1 minute.  Stir the chocolate and milk until smooth and then pour over the cake and spread to fill in the holes.  Set cake aside to cool (you can hasten the cooling by sticking in the frige - which is what I did)

To make the whipped topping, whip heavy cream until it begins to thicken.  Add powdered sugar, cocoa and vanilla extract and continue to whip until stiff peaks form.  Spread whipped topping on top of completely cooled cake.

Here's where you can get creative and chocolate it up ever further by sprinkling mini chocolate chips on top, and then drizzle the chocolate ice cream syrup on top of all that!

You'll want to keep in the refrigerator until ready to serve because of the whipped topping.    

So there you go.  See what  I mean?  (devilish giggle)


I am participating in Meal Plan Monday


Friday, February 12, 2016

Freezer Foods Friday is back

I hope your as excited as I am that Freezer Foods Friday is making a comeback. It's been a while and I've missed it.    Here's a little , er... educational introduction... to kick us off.

This might be "old news" to you, a refresher, or a new slant. However you receive it, I hope there is something you can use or add to. 


There are many types of "freezer cooking" methods. There's the OAMC (Once a Month Cooking); TAMC (Twice a Month Cooking); Mini Sessions, preparing meals by categories...The methods and lists are as vast and varied as individual's tastes.

Whatever "style" you adopt, the most important rule is organize your recipes!

You can have a card-file system or notebook file system. I use the notebook pages because I can have each recipe printed on an individual page, put in a page protector and place in a three ring binder. You can see my post about organizing my recipes into notebooks by clicking here:  Organizing My Recipes from Magazines, etc.

Before cooking day, study each recipe to decide on the order in which you'll prepare them. It may sound like overkill, but it really helps the process run more smoothly. Once you've decided, put the pages in order in which you will prepare them. The page protectors are great because I almost always spash! All I have to do is wipe these clean.

Menu - You might like to fly by the seat of your pants, but you really need to do a menu. You don't really want a month of all Mexican, or Italian food do you? There are all sorts of sites with good forms to print out for menus and I've used a lot, but in a pinch, I like the old, take a sheet of notebook paper, fold it in half, fold it again, and again. Unfold and you've got 8 blocks. Yeah, I know there aren't "usually" 8 days in the week, contrary to what the Beetles said! (I'm showing my age aren't I). Just fill in the 7 blocks with a day's menu.  Super simple, right? 
Try only a few new recipes each month. (That way if it flops, it was only one meal) Your menu should be mostly ones your family already likes.

If you're not sure a family favorite will freeze well, when you prepare the dish, take out a portion and freeze it. "Test" it in a week or two to see if it passes the test. If so, great! You've got another freezer-food to add to your list. And, well, if it doesn't, you haven't wasted time and money.

And I can't stress this enough... Label your foods!  In a month or so, you won't be able to tell the difference between chicken broth and squeezed lemon juice (for lemonade) by just looking at that freezer bag.  Trust my experience, here.

I like to buy steaks and chicken when they're on sale.  My husband is the designated "griller" in the family and he's a steak kinda guy.  I don't make my marinade for the beef, but I buy a marinade called "allegro".  I really like the flavor of this.  So, what I do, is when our local grocer has steaks buy one get one free (I love those deals!) I buy what they will allow, bring them home and place in a zippered type freezer bag, pour the marinade into the bags and freeze.   When we're ready for grilling, I take them out to thaw in the frige and while they're thawing, they're marinating.  Win Win!

Ok, I can't leave chicken out, can I? Here's a couple of great freeze-in-the-bag-with-chicken marinades.  If you will notice one recipe I used as a marinade is from the recipe that everybody was making a while back...You know, the Apricot Chicken recipe? Well did you know it makes a great marinade for grilling chicken? It does!


Honey Chicken Marinade
3 TBSP soy sauce
1 TBSP honey
1 TBSP olive oil
1 tsp lime juice
1 tsp garlic

Apricot Chicken Marinade
1/2 bottle Catalina dressing
1/2 packet of dry onion soup mix
3 TBSP olive oil
12 oz jar of apricot preserves - heated in the microwave until runny.

Alright, if I haven't bored you to tears yet, I want to leave you with one more recipe. Would that be ok?
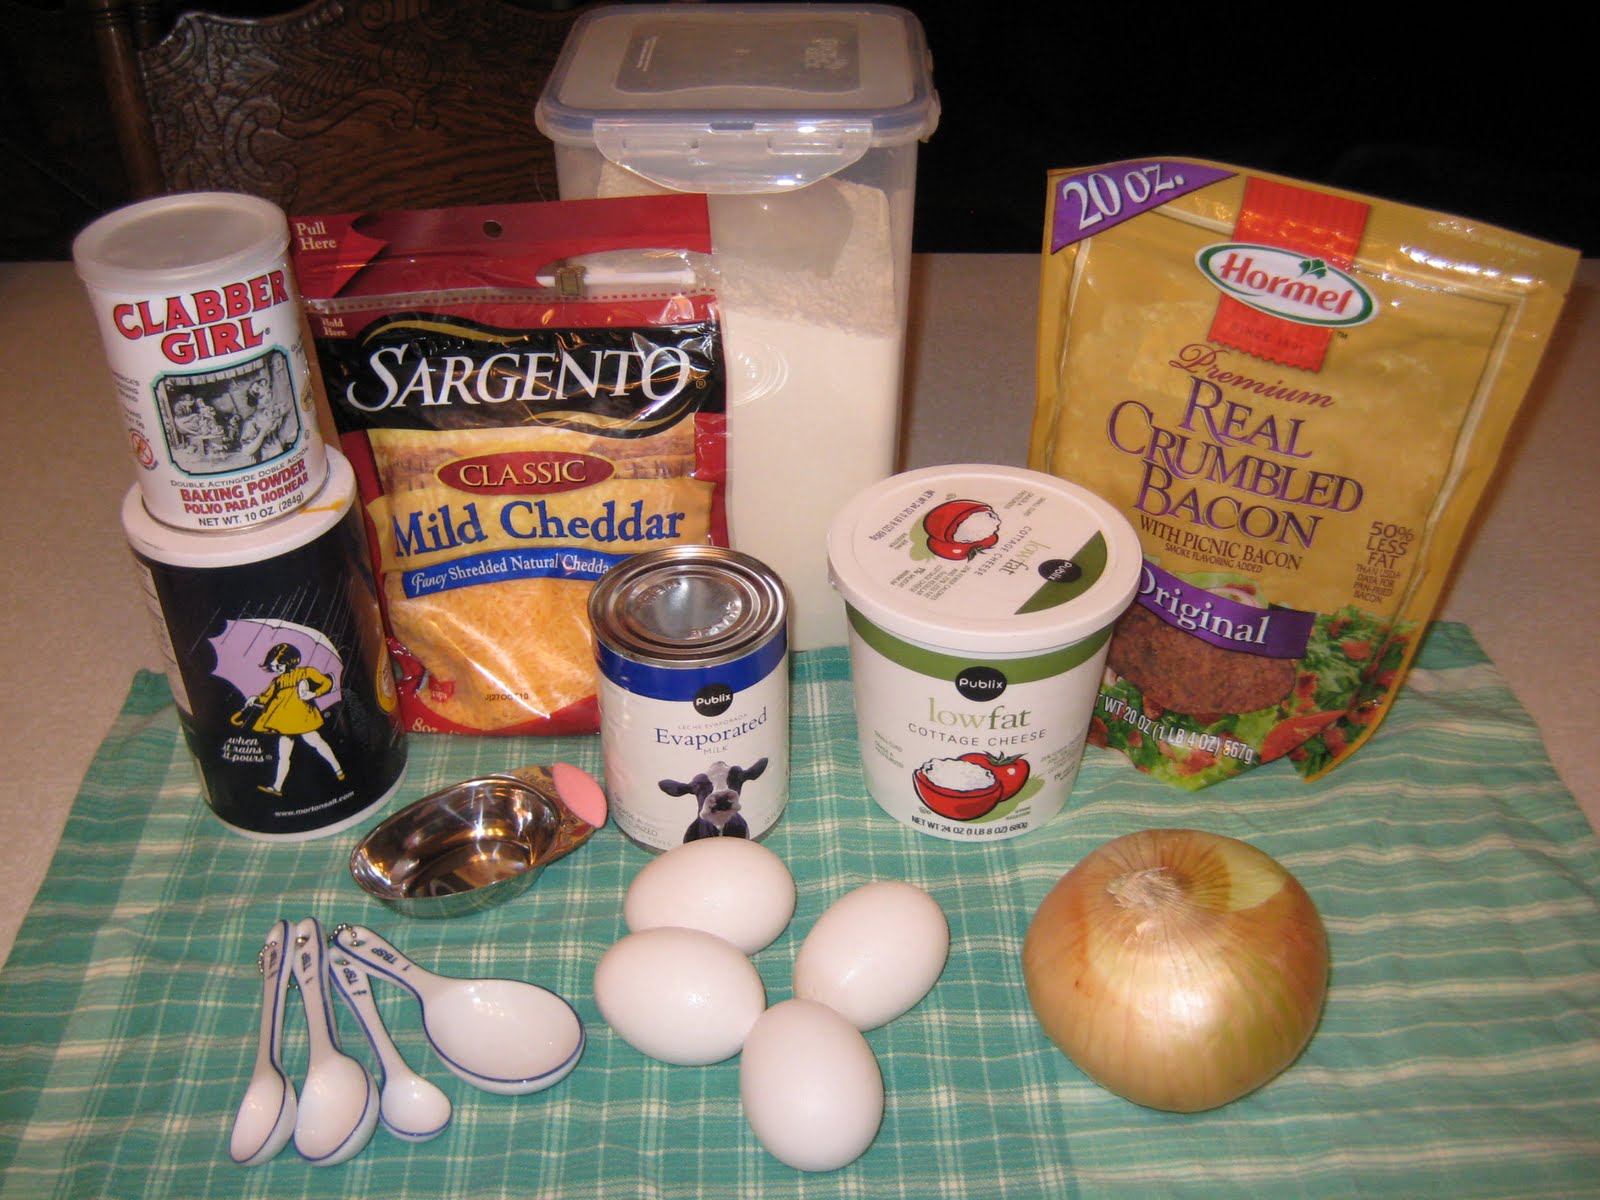
I've had this for probably 18 years or so, and I've made them into little (portion controlled) muffins, with a crust, without and called it a casserole, you name it.  But it was originally called Crustless Quiche.  It's great to fix ahead and have for holiday breakfasts or brunch.

You're going to need...
16 ounce container cottage cheese
4 eggs
1/4 cup milk (you'll notice I used evaporated milk, you can use regular "jug" milk but this makes it richer)
1/4 cup flour
1 teaspoon baking powder
1/4 tsp salt
2 cups cheddar cheese, shredded (I used mild but you could use sharp too)
cooked and crumbled bacon (equal 10 slices) I cheated, see pic?!
1/4 cup chopped onions

Process cottage cheese in a food processor or blender until smooth.  (I use a blender)


transfer to a large bowl
In a medium bowl beat eggs.
Add milk, flour, baking powder and salt to eggs and mix until smooth.
Add egg mixture to cottage cheese and mix.
Stir in shredded cheese, bacon and onions.

Now here's where you choose... Do you want to bake and freeze, or just freeze?

If you want to bake 'em now and freeze, then pour into muffin tins (mini or regular - doesn't matter)
bake at 375 degrees for 12-15 minutes or until edges are lightly browned.

Cool and freeze in freezer bags.

I chose to pour the mixture into freezer bags to bake later. When I'm ready to bake 'em, I'll just thaw in frige and follow the above instructions.

I hope this has helped inspire you to either begin, start back up, or step up your freezer game a bit. Don't forget to check back next Friday for another tried-n-true freezer meal and I will share with you about Freezer Meals parties, and making freezer meals with a friend.    Until then,

Be Sweet!


Wednesday, October 22, 2014

Easy Homemade Apple Cider

Did you know you can make your own apple cider using your food processor?  It's so easy, you'll never pay the big-bucks for apple cider again.   Here in Florida we don't have many apple orchards. In fact, if you know of any, please tell me.    But every October, there is an apple festival in north Georgia.  My sister went and gifted me with a bushel of apples.   These were Gala apples.  I thought they would be too mild for applesauce (another easy-peasy thing to make at home) so I tried this.  (I prefer apple cider over apple juice, but that's me)

There's no recipe per se.  But all you I-Need-A-Recipe folks, don't fret.  You don't need one.  You do, however, need a food processor and cheesecloth. Well, you don't even need cheesecloth.   I used what's called bar cloth. Walmart sells these in packs of five in the kitchen towel area.  Get those.  You'll get tons of use from that five-pack.


Here goes,

Wash the apples really well, because you're going to leave the peels on. You know those nifty little apple slicer/corer things?  Using that will help the process along quite nicely, but if you don't have one don't worry.   Just slice it the way our grandmothers, or great-grandmothers, did it.  You don't want the core and seeds, mind you.

Toss those slices into the food processor.   Don't fill it full of slices, half full is fine, otherwise you will be there a while.   I know, it seems counter-intuitive, but doing multiple half-full bowls is really quicker.  Process it until you have "mush", or as mushy as you can.

Have a large bowl, with a collander inside and the barcloth, or cheesecloth, inside the collander. Dump that mush into that.  (such technical terms)

Next, gather up the edges and give it a good squeeze to make a ball.

Quite a bit of juice is already draining.

At this point, I ladled out a taste.  Ooooh.  Heaven!

To make sure you get all the goodness (juice) extracted, place a heavy object on top of the bag of mush (those technical terms again).  I used the heaviest pot I could find.  Let that sit a few hours, or overnight if you don't have "critters".


and there you have it.  You apple cider maker, you.

Note:  This is not pasturized, so it won't keep as long as commercial stuff.  A week is fine in the frige.  But if you want to do bulk batches, you can freeze it.    Enjoy.  

How do you enjoy fall's bounty of apples?  I'd love to hear.

Sunday, December 22, 2013

Red Velvet Cheesecake cookies with white chocolate drizzle

I want to share a new recipe I tried out this past week for the Real Women Eat's Christmas Tea.  We were doing a gift exchange, but with a twist.  The "gift" had to be a baked item, and it was supposed to be something we have never made before.  So, my collection of recipes just wouldn't do this time. Off to Pinterest I go.  I found Two Peas and Their Pod's site where these beauties were.  She had me at "red velvet" and when I saw these were cookies, all the better!  (I'm such a cookie monster!) These cookies should come with a warning... they are very rich.  LOL.   They're not hard, but they do take a little bit of time investment, but oh, so worth it!   So here goes....

Red Velvet Cheesecake Cookies


Cookies:
  • 1 box red velvet cake mix (I used Duncan Hines)
  • 2 tablespoons all-purpose flour
  • 2 large eggs
  • 1/2 cup canola oil
  • 1 teaspoon vanilla extract

Cheesecake filling:

  • 4 oz cream cheese, at room temperature
  • 2 cups powdered sugar
  • 1 teaspoon vanilla extract

White chocolate drizzle:

  • 1 1/2 cups white chocolate chips, melted

Directions:

To make cookies, combine cake mix and flour. Whisk until clumps disappear before placing in mixing bowl. Mix together cake mix, flour, eggs, oil and vanilla extract. Mix until smooth. Wrap the dough in plastic wrap. The dough will be oily.  And I really mean oily!   The recipe said to refrigerate for 2 hours.  I had running around to do, so they stayed in there a lot longer than the two hours (and were fine)

To make the cheesecake filling, combine cream cheese, powdered sugar, and vanilla extract. Mix until smooth. Using a teaspoon, scoop out cheesecake filling and place on a plate. Continue scooping out cheesecake filling into teaspoon balls until you have 10. Place plate in the freezer and freeze for at least two hours. Again, more than two hours didn't hurt. 

Preheat oven to 350 degrees F. Line a large baking sheet with parchment paper-  or a silicone baking mat if you have one.  I don't. 

To assemble the cookies, take about 1/4 cup of red velvet cookie dough and flatten in your hands.(I used one of those ice-cream-looking scoops that I use for cupcake batter)   Place a teaspoon of cheesecake filling in the center and wrap the cookie dough around the filling. Gently roll into a ball and place on prepared baking sheet. Scoop onto lightly greased or parchment lined baking sheets. Only bake 3 cookies at a time. The cookies are large and will spread.  Trust me, she knows what she's talking about.  So, really, only three at a time.  Ya, hear??

Bake for 11-13 minutes or until the cookies begin to crackle. Let the cookies cool on the baking sheet for 5 minutes. Remove from baking sheet to a wire cooling rack and cool completely.

Melt the white chocolate chips in a microwave safe bowl or over a double-boiler. Drizzle the white chocolate over the cooled cookies. Let the cookies set until the chocolate hardens. 

Note: I bought the white chocolate chips, but ended up using the white candy coating wafers instead thinking it would harden quicker.  I didn't see where I saved any time using the wafers so go ahead and use the white chocolate chips!  


These cookies are really rich and I doubt you'll be finishing them in a day, so store in the frige.  My husband ate one and said he felt like he had eaten half a dozen...THAT rich. 


Saturday, October 26, 2013

Re-Use that Ketchup Bottle

I love honey.  My sister gave me a gallon of honey recently.  The gallon jug isn't easy to handle, so I wanted to pour it into something more "user friendly".  I tried those cute bear bottles, but those don't hold enough, and I end up collapsing the flimsy plastic bottle after several fill-ups.  What to do...   enter the ketchup bottle!

This is probably not a new idea, but it's new to me, so allow me to live in my fantasy world and think that I, alone, had this wonderful idea.  At least for a little bit.  

I just washed out the ketchup bottle (thank goodness there were no lingering smells.  As much as I love ketchup, I don't like to co-mingle it with honey)  and viola!  My new honey dispenser.   Since it's a no-drip cap, it's perfect for the honey too!

So, tell me, what have you repurposed?  I'd love to hear.  Please share in the comments, or if you have done a blog post, leave a link there so we can all come visit!

Wednesday, May 15, 2013

Make your own Fruit Flavored Waters

Ok, I'll admit it.  I'm behind the curve on this one.  Oh sure, I've been drinking "water with lemon" for years. But my mind was totally blown when I saw (sensory overload) all the different fruit water options!   I found some strawberries and kiwis at Aldi's for ultra-cheap.   The strawberries were from Wish Farms, and honestly they tasted like someone had injected pure sugar into them!  I couldn't resist snacking on some as I'm cutting them for my water. (I like it that Wish Farms is a local USA company too!)


My drink of choice was strawberry and kiwi.  But think about the options....
Strawberry/blueberry 
Pineapple/peach, mango 
Blueberry/raspberry
Orange slices
Watermelon
Cantaloupe/Grape
Peach/Nectarine
Plum/Apple
Raspberry/Lime
You could go absolutely wild!!!
Oh!  and at the health food store, I found a chocolate flavored stevia.  Mix that with a spearmint and woozers!  Chocolate mint water!  Yummm.... 

First I just put the fruit into a glass with water.  Since I liked it so much, I wanted it at the ready in the frige for the rest of the week so in comes...

This is perfect for my fruit.  There's a "tube" that screws into the lid. I just poured in my water filled the tube with my cut up fruit, screwed it back on the lid  and I was good to go.  

You can get one at Amazon.com here which I'm excited about, because that one is cheaper than I paid for mine!  If you want a really full flavor, do your water a day before.  The flavors are out of this world!  That's what I did and it made such a difference in the "flavor level".  
Do you do your own flavored waters?  I'd love to hear what you do.  Please leave me a comment and share with us all. 

LinkWithin

Related Posts with Thumbnails