


I used made these years ago to sell in craft shows and when I needed to make something to send in an ornament exchange I thought of these. I was surfing and saw a "make it with what you have" blog carnival and thought I'd do just that with my "stash" of loose ends that I couldn't bear to toss. Granted, they're doing "big" items, and this is a little ol' ornament, but I used what I had - so that counts for something, right? Then I started thinking that maybe some of my blog buddies might like to make some...just in case you're a "bag lady" like me!
It's really simple, and you don't need any advanced sewing skills! LOL Pics probably aren't needed (especially after seeing what a photographer I am!) but here's a few anyway.

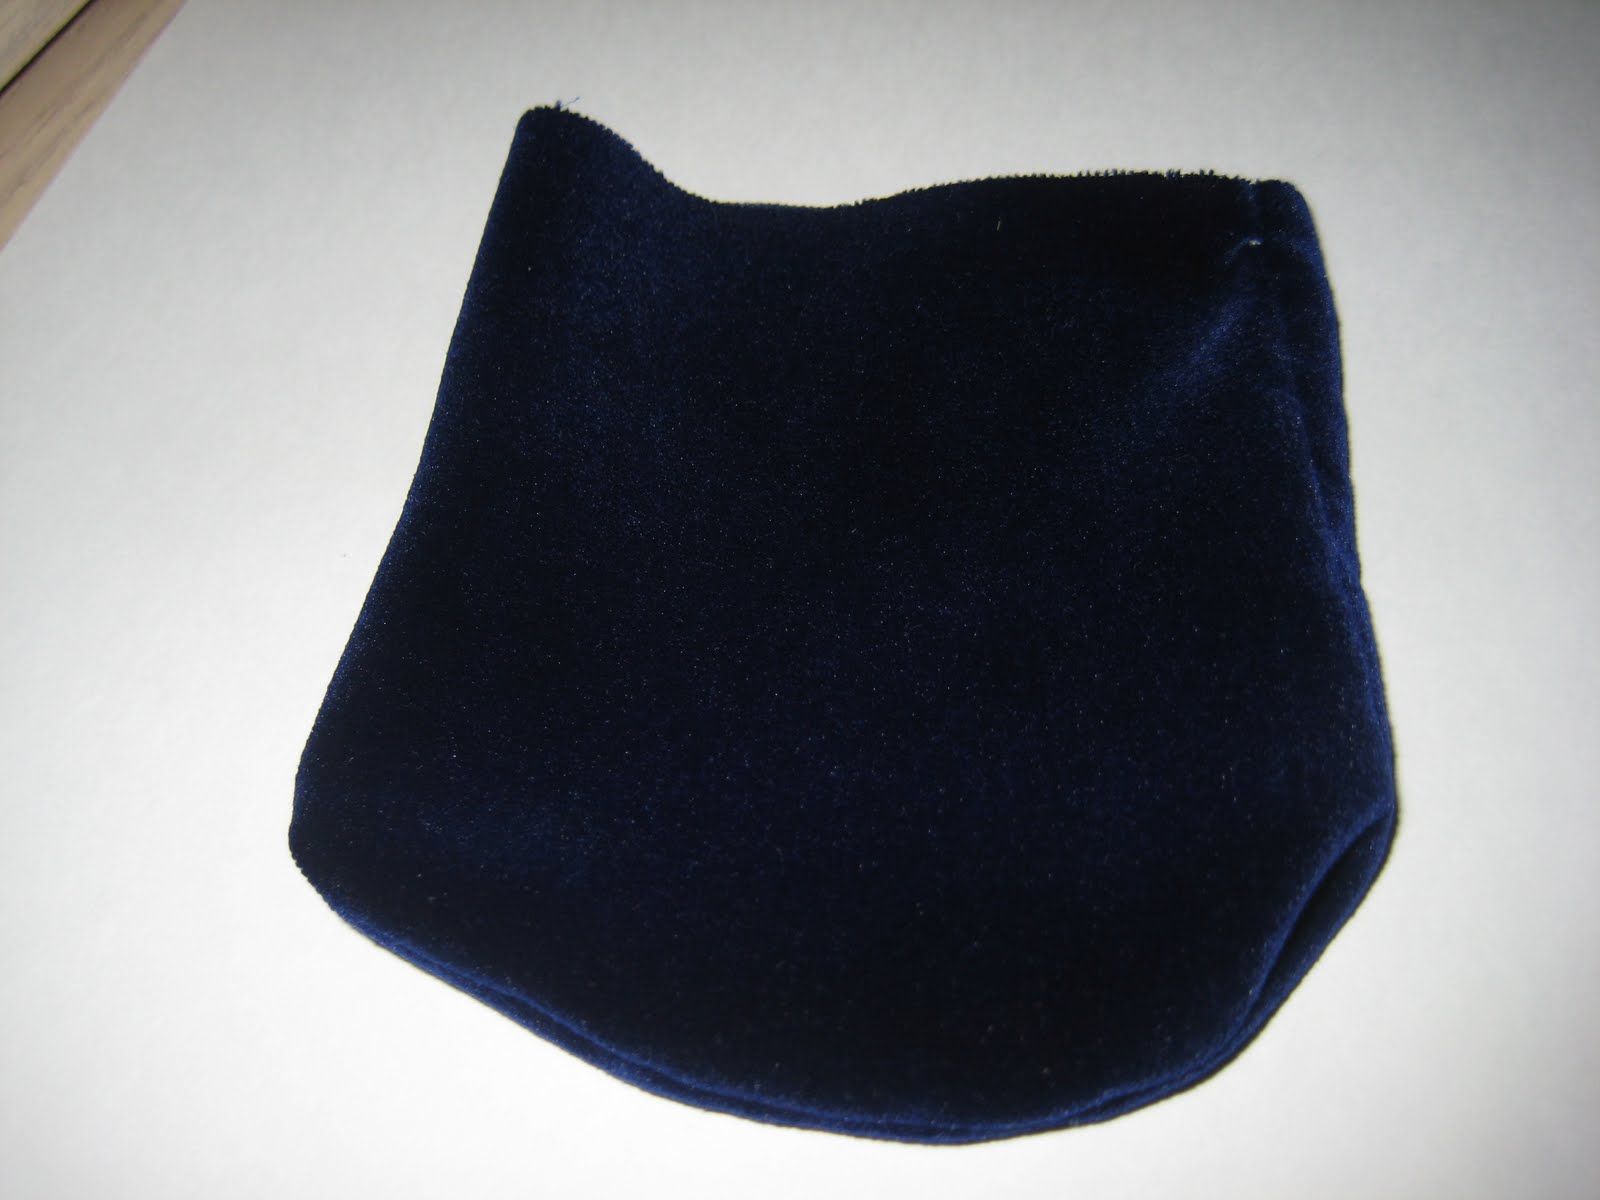
First, gather all your "loose ends" stash like lace, cording, hot glue gun and glue sticks, poly-fill stuffing, needle, thread, fabric. I used velvet for the purse body. You don't have to, but it just looks so elegant (it sheds though- Ugh!).
Make yourself a template out of cardstock, cardboard..whatever. It should measure 4 x 6 inches.
Make yourself a template out of cardstock, cardboard..whatever. It should measure 4 x 6 inches.

Trace the template onto your fabric (wrong side). Fold the 4 x 6 inch piece of fabric in half (making it 4 x 3 inches). Sew a scant 1/4 inch around three sides. You see in the picture on the left, the "bottom" of the purse has curved lines? You can eyeball it or find something to make that curve I used a half round template from my quilting rulers, but a cup or glass that would fit would be fine..just anything so your purse doesn't just look like a straight bag..unless that's what you're going for. Turn right sides out.

Stitch a running stitch, or gathering stitch, by hand all around the open end but don't close it off yet.
Now get out your stash and have fun! Eye it up on your purse and see what you like

Lightly stuff the purse body with poly-fill, or stuffing of choice. Remember lightly! Put just a dab of hot glue on the ends of the cording (I used gold because, again, it looks elegant) and put into the sides of the purse. Now you're going to pull the thread to gather (only slightly) the open end. To cover the ugly gathered ends, you will want to dig in the stash, you can use lace, those beaded do-hickies you buy sewn into ribbon (pardon the technical jargon), gimp, whatever. Run a line of hot glue around ugly ends and glue whatever you choose to cover it up. You'll notice I layered different things. The sky is the limit - just have fun. And don't forget to "finish" it off with a button ... kinda like a "snap" on a purse.
I hope I haven't totally confused you. But if I did don't hesitate to ask and I'll see if I can confuse you even more.
I hope I haven't totally confused you. But if I did don't hesitate to ask and I'll see if I can confuse you even more.


So cute! And such a good idea for all the scraps! I can't wait to give it a shot! Thanks so much for adding your inspiration to the DIY holiday party! These are great hand-made gift idea too! Or to decorate gifts. Add a little scented oil or dryer sheet and use a sachet too. So cute!
ReplyDeleteRoeshel
you are my favorite bag lady, love those jewels.. very nice.
ReplyDeleteSuper cute project
ReplyDeleteCheri
Those are really cute!! Someone could put a really small expensive gift into one, or two or three of them! :)
ReplyDeletewow! these purses are so cute! i wish i could make it by myself...
ReplyDeletehave a swwet week!
justyna
I'm so glad you joined the party...I was hoping we'd get all manner of 'big' and 'small' projects to inspire me, and your wee purses definitely fit the bill! Thanks for the tutorial, too, because I'm visual...pictures are always welcome for me! These are darling, and I think I'll try some rustic variety with some burlap and jute twine for my tree this year.
ReplyDeleteThanks for linking up!
peace.
Just adorable!
ReplyDeleteI had to click on the pic for a closer look. :) These are wonderful, Jeanette, and I'm sure they look very beautiful on a Christmas tree! Thanks for sharing the "How To"!
ReplyDelete:)
Zuzu
Hi Jeanette,
ReplyDeleteThank you so much for stopping by my blog, your blog is delightful. I really adore those Victorian purses, you have such great craft and cooking ideas. I'll be calling around here from now on.
All things nice...
These are so adorable! Hope you're having a good weekend...
ReplyDeletepk @ ROOM REMIX
I think they are adorable!
ReplyDeleteHey Sweet Jeanette,
ReplyDeleteThank you so much for visiting and commenting at my blog...because it lead me to yours. So nice to meet you. Your blog is so pretty and fun! I love these victorian bag ornaments that you make...I must make some of those for my bedroom Christmas Tree. Maybe I can do that through the coming year, and have them on the tree next year. I love yours, and thank you for showing how you did that. You are very talented. I loved seeing your 2 pretty trees ...what a sweet idea...having the friendship tree, that's a great idea, and the gold and crystal tree is so elegant and beautiful, it really shines. I'd love to see the yoyo tree skirt that your MIL made. I think yoyo's are precious! I'm working on getting my living room Christmas tree up, (just taking me a little break now) I've got it up, now it's time for the fun part...putting on all of the ornaments! I'll come get you, when I get it posted on my blog, that will be sometime next week! We can have some of that cyber mulled cider you talked about. Sounds delish... Looking forward to visiting you again soon. Have a great weekend!
Big Hugs,
Queenie
These are so cute! I can't sew for the life of me, though. I really did try. I was in fashion design school, because I wanted to start a maternity and baby/child clothing line...but I failed at sewing. I took the basic class 4 times before I just had to give up. You're very talented!
ReplyDeleteVery crafty you are!
ReplyDeleteCongrats on your SITS day!
Oh my goodness, those are so pretty and unique!
ReplyDeleteJust darling!
ReplyDeleteCongrats on your SITS day!
Very pretty! You're so crafty!!!
ReplyDeleteThose are so adorable! I'm bookmarking this to try later! :)
ReplyDeleteHappy SITS Day! :)
Love the ones with the little roses. Storing this idea for next year!
ReplyDeleteCute, cute, cute!!
ReplyDeleteHappy happy SITS day!
Absolutely adorable. HAPPY SITS Day. You have a great blog.
ReplyDeleteThey look great!
ReplyDeleteThose are stunning! Happy SITSday again--I love your beautiful blog!
ReplyDeleteHow cute! I'm going to try making one. TRY being the key word. ;)
ReplyDeleteHappy SITS Day and Happy Birthday Eve!
These are so cute!
ReplyDeleteHappy SITS day!
Love those...simple and easy but oh so elegant.
ReplyDelete